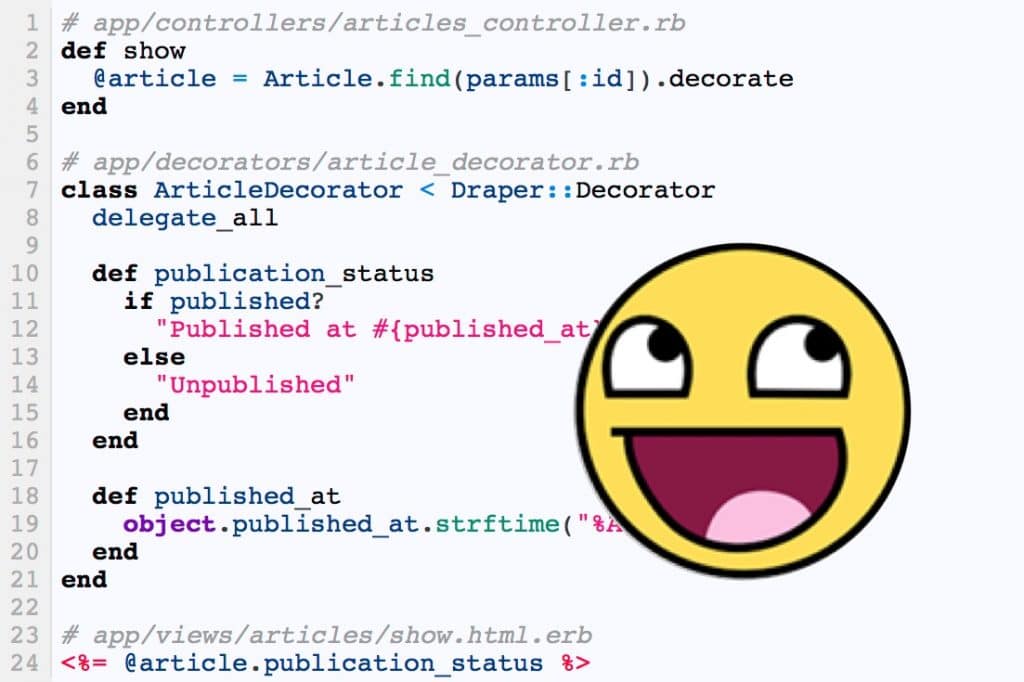
Nowadays you can choose from hundreds (if not thousands) of cloud hosting providers and there is always a chance that you will have to change your current provider. Currently OpenStack is one of the most popular cloud projects.

  • So if you decided on migration, there are always two main migration options:
  • The first approach should be used if your new cloud provider is not compatible with the old one. But keep in mind that it will take pretty much time.

The second one is much faster but requires your team to have an excellent DevOps experience. And here I want to share our experience of fast migration from one OpenStack provider to another. Lets go step by step:

1) The first step is to create a virtual machine with two virtual hard drives at your new cloud provider and connect to it via ssh. There you should install OpenStack client and qemu utils.

[bash]
apt-get update
apt-get install -y python-pip python-dev \
libffi-dev libssl-dev qemu-utils

pip install wrapt monotonic netifaces jsonpatch jsonschema \
ndg-httpsclient pyasn1python-neutronclient \
python-keystoneclient python-novaclient \
python-cinderclient python-glanceclientpyopenssl
[/bash]

2) Now you can list available instances:

[ruby]
nova –os-username $USER_NAME \
–os-password $PASSWORD \
–os-tenant-id $TENANT_ID \
–os-tenant-name $TENANT_NAME \
–os-auth-url $AUTH_URL \
list
[/ruby]

3) And create snapshot:

[ruby]
nova –os-username $USER_NAME \
–os-password $PASSWORD \
–os-tenant-id $TENANT_ID \
–os-tenant-name $TENANT_NAME \
–os-auth-url $AUTH_URL \
image-create\
–poll $SNAPSHOT_ID $SNAPSHOT_NAME
[/ruby]

4) Once the snapshot is ready, you should download it to your new server:

[ruby]
glance –os-username $USER_NAME \
–os-password $PASSWORD \
–os-tenant-id $TENANT_ID \
–os-tenant-name $TENANT_NAME \
–os-auth-url $AUTH_URL\
image-download \
–file $IMAGE_NAME.qcow2 \
–progress $IMAGE_ID
[/ruby]

5) List virtual hard disks with lsblk-command. You’ll see something like this:

[shell]
vda 202:0 0 20G 0 disk
└─vda1 202:1 0 8G 0 part /
vdb 50G
[/shell]

6) If there is no need to extend disk size, you can use dd command to copy image to your virtual drive. Skip 6a step!
* If you you have bigger disk on the new virtual machine and want to extend partition size – use rsync. In this case, you can mount unconverted qcow2 image with qemu-tools and skip steps 6b and 7.

6a) Create new partition and copy data from image

[ruby]
# Mount image
mkdir /mnt/qemu
modprobe nbd max_part=63
qemu-nbd -c /dev/nbd0 $IMAGE_NAME.qcow2
partprobe /dev/nbd0
mount /dev/nbd0p1 /mnt/qemu

# Run parted and create MBR and partition
parted /dev/vdb
(parted)mklabel msdos
(parted) mkpart primary ext3 1M 100%
(parted) set 1 boot on

# Format and mount patition
mkfs.ext4 /dev/vdb1
mkdir /mnt/vdb
mount /dev/vdb1 /mnt/vdb

# Copy data from image
rsync -avxHAX –progress /mnt/qemu /mnt/vdb
[/ruby]

6b) Convert image to RAW-format

[plain]
qemu-img convert $IMAGE_NAME.qcow2 $IMAGE_NAME.raw
[/plain]

7) Run copy:

[plain]
dd if=/path/$IMAGE_NAME.raw of=/dev/vdb bs=16M oflag=direct
[/plain]

8) Update partition info:

[shell]
partprobe /dev/vdb
[/shell]

9) Mount created partition and temporary api filesystems:

[shell]
# if using rsync don’t forget to mount proper folder
mount /dev/vdb1 /mnt
cd /mnt
mount -t proc proc proc/
mount -t sysfs sys sys/
mount -o bind /dev dev/
[/shell]

10) Chroot to new file system:

[shell]
# if using rsync, chroot to folder where your partition mounted
chroot /mnt /bin/bash
[/shell]

11) Install grub to make sure your system will boot properly:

[ruby]
grub-install –target=i386-pc –recheck /dev/vdb
[/ruby]

12) If you dont have ssh-key or don’t know root password, you can add user, add ssh-key and make him sudoer.

13) Exit chroot and poweroff. Detach first hdd(vda in this exaple) and start the machine.

This way you got a full copy of your old server without any knowledge about specific services inside. In our case we had to migrate over 10 servers at once. This approach saved us a lot of time and I hope it will save your time in future.

Questions? Comments? Let’s talk about them in the comments section below.

How useful was this post?

Click on a star to rate it!

Average rating 4.9 / 5. Vote count: 14

No votes so far! Be the first to rate this post.

We are sorry that this post was not useful for you!

Let us improve this post!

Tell us how we can improve this post?


Author

CMO at Rubyroid Labs

Write A Comment

https://ftp.scala-sbt.org slot gacor https://rumblr.zedge.net game slot online Slot88 https://olympics.cybintsolutions.com slot deposit pulsa tanpa potongan