There’s nothing worse than watching your app drop in search rankings or slow down at the moment it matters most.
And while optimizing performance is a great first step, it’s not a cure-all.
In many cases, the smarter move is to proactively scale your application.
If you’re thinking, “Hey, I’m not exactly Netflix yet, why would I scale now?” just wait.
Scaling a Ruby on Rails application isn’t just for “big companies.”
In fact, it’s a smart move for any small or mid-sized business that wants to future-proof its app, keep it fast and responsive, and boost those all-important SEO rankings.
This post is useful whether you’re just starting to build your Rails application or already managing an existing project and want to scale it efficiently and without overspending.
You’ll learn the most common types of scaling, uncover typical mistakes, and explore best practices for scaling Rails apps to help them handle high traffic before it becomes a problem.

Contents
- What Is Scaling and Why It’s Important from the Start
- Horizontal vs Vertical Scaling: Understanding the Difference
- What You Need to Know About Methods of Scaling
- Best Practices for Scaling Rails App
- Typical Mistakes When Scaling a RoR App
- RoR Infrastructure for Scaling: How to Avoid Difficulties from the Start?
- Final Words
What Is Scaling and Why It’s Important from the Start
Scaling is an application’s potential to handle an increasing number of user requests per minute (RPM).
Even if your business is not that big, scaling the application is still the point to consider. The truth is that scaling prepares your product to be flexible and ready for future growth and major technical headaches later.
Why having a scalable application is a priority:

Performance matters
Even if you’re just building a simple blogging platform, performance issues can creep in as your data grows.
For example, the more posts you create, the more power your app needs to manage them efficiently. Once you have 1,000+ posts, querying recent posts by a specific user can start to slow down, especially if proper indexing or query optimization wasn’t implemented from the start.
Unscalable Code Is Harder to Fix
If scalability isn’t considered in your early decisions (e.g., database structure, background jobs, caching), you might have to rework large parts of your app later. That means more time, higher costs, and slower development when it really matters.
User Growth Can Spike at Any Time
You launch your MVP with just a few users. One day, a tweet from an influencer brings in 10,000 visitors in an hour. Your app crashes under the load because it wasn’t optimized to handle that kind of spike.
Data Complexity Grows with Features
As your app evolves, you’ll likely introduce more features like comments, likes, tags, notifications, etc. Each new feature adds more data relationships and query complexity. Without scalable patterns like eager loading, pagination, or indexing, things can get slow quite quickly.
Downtime Hurts Trust
If your app slows down or crashes during peak usage, users lose confidence. Worse, they might not come back. Scalability brings a lot of reliability, which is vitally important for your brand’s reputation.
Scaling a Ruby on Rails application is more than the ability to handle large amounts of users. By having the right infrastructure, you get a stronger and well-performing application that works efficiently and is ready for sudden growth.
With over 12 years of providing RoR services, we can help you build a scalable platform from scratch or identify the best strategies to scale your existing one.
Let’s break down what main strategies for scaling exist.
Horizontal vs Vertical Scaling: Understanding the Difference
There’s a common but mistaken belief that scaling a Ruby on Rails app is tough. In truth, an application’s scalability depends far more on its architecture than on the framework or programming language used.
There are two main ways to approach scaling: vertical scaling and horizontal scaling. Let’s quickly break down what each of these means.
Vertical Scaling
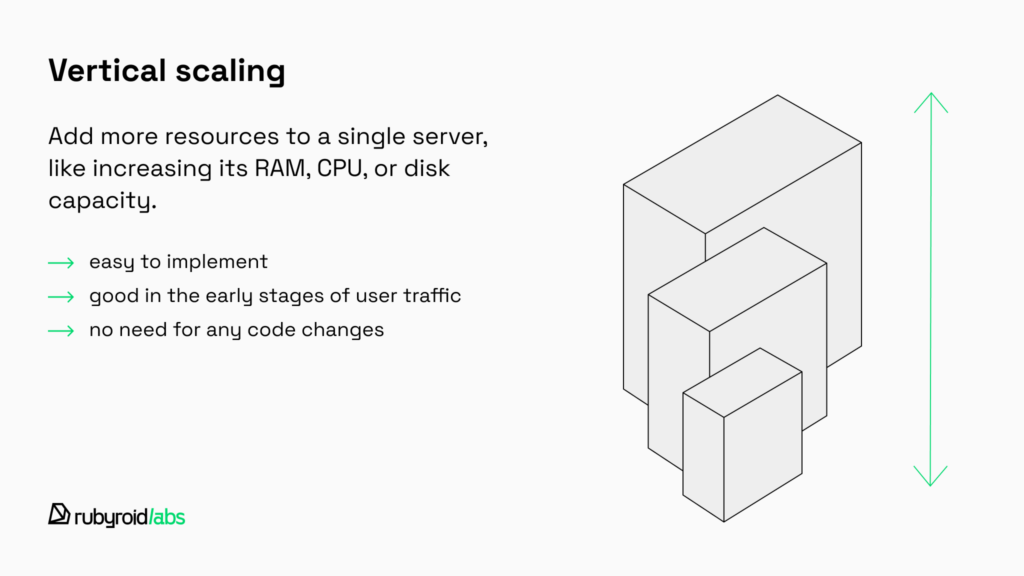
Vertical scaling means improving your existing server by giving it more resources, like adding more RAM, a faster CPU, or extra disk storage. You’re still running your application on one single server, but that server becomes stronger and faster.
For example, your Rails app is on a server with 4 GB of RAM and starts slowing down. You fix it by upgrading to 16 GB of RAM and a better processor.
Vertical scaling is great for when you’re just starting to see increased user traffic. It’s easy, straightforward, and doesn’t usually require changes to your code.
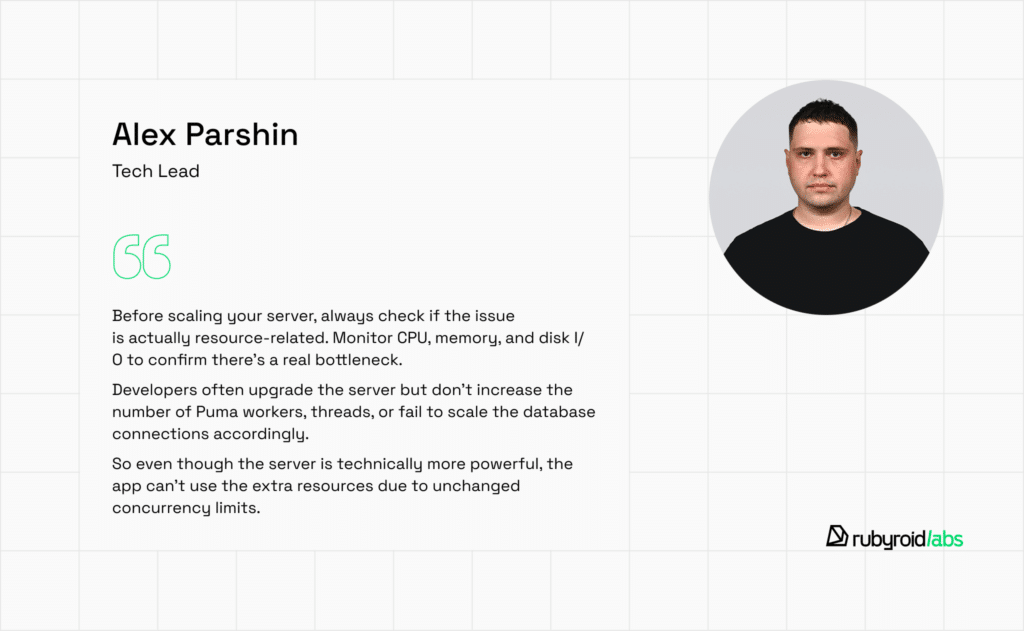
But here’s an important tip: before you rush to buy more server resources, double-check what’s actually causing the slowdown. Sometimes, performance issues are due to inefficient database queries (like N+1 queries), memory leaks, or blocked input/output operations, not necessarily a lack of server resources.
To verify if your server is genuinely overloaded, you can use simple monitoring tools like top or htop. These tools give you real-time insights into your CPU and memory usage, helping you quickly identify the real issue.
Nuances in this strategy:
- There’s a physical limit (you can’t keep adding resources forever).
- It can get expensive pretty quickly, as powerful hardware tends to cost more.
- If the server breaks, the whole app goes down.
Horizontal scaling
Instead of relying on just one powerful server to handle all your traffic, horizontal scaling means running your Rails app on several machines simultaneously. It’s like having several team members sharing the workload instead of one person doing all the heavy lifting.
For example, you could deploy your Rails application on three separate servers and put a load balancer in front. This balancer efficiently distributes incoming traffic among your servers, ensuring no single machine gets overwhelmed.
The horizontal method of scaling is usually the best way to scale a Ruby on Rails product. It helps your system handle growth smoothly and makes your application much more resilient. If one server has an issue, the others keep things running smoothly—so your users barely notice anything went wrong.
But, of course, horizontal scaling isn’t without its challenges:
- Has a more complex setup.
- You may need to make your app stateless (e.g., use Redis for sessions).
- Requires infrastructure knowledge (load balancers, auto-scaling, etc.).
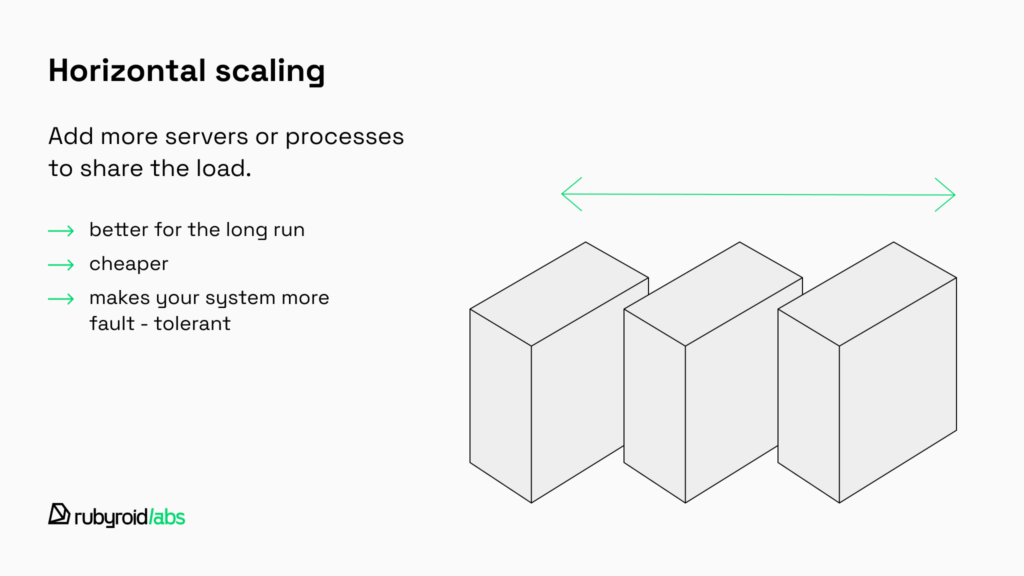
In summary, vertical scaling allows you to squeeze extra power from one single machine, while horizontal scaling helps your app reliably handle traffic spikes, unexpected crashes, or steady growth. Combining both methods is a balanced and cost-effective way to maintain good performance and reliability without jumping into expensive, complicated architecture changes too soon.
What You Need to Know About Methods of Scaling
Most product owners naturally start with vertical scaling because it’s the simplest and fastest way to give an overloaded server some breathing room as usage grows.
Adding more RAM, more CPU, and optimizing things like thread or worker counts can be very effective in certain scenarios.
Here’s when it really helps:
1. Puma (Your App Server)
If you’re using Puma (and most Rails apps are), vertical scaling can help you handle more requests in parallel by increasing:
- Threads. Great when your app waits on IO (like external APIs or the database). More threads = more concurrent requests.
- Workers. These are separate processes (forks). They help with CPU-heavy workloads, but each one requires more memory.
When it helps:
- Your CPU and RAM aren’t maxed out yet.
- You notice long queue times or slow request handling.
Quick example config:
# config/puma.rb
workers 4
threads 4, 16
This setup gives you 4 workers, each with up to 16 threads, which is plenty of firepower if your server can handle it.
2. Database (PostgreSQL or MySQL)
More RAM can significantly help your database performance, especially if:
- Your queries are hitting the disk too often (slow reads).
- The database cache isn’t big enough to hold your tables or indexes.
- You aim to handle more simultaneous connections.
But be careful, as each Puma worker holds its own connection pool. So if you have 4 workers and each can spin up 16 threads, that’s potentially 64 database connections. PostgreSQL, for example, defaults to around 100 max connections. You don’t want to hit that limit unintentionally.
3. Sidekiq (or Other Background Workers)
Vertical scaling helps here too but again, only in the right situations. Adding more threads or processes in Sidekiq is useful if:
- Your job queue is backed up and not processing tasks fast enough.
- Your jobs are lightweight in terms of CPU and mostly wait on IO (like sending emails, calling APIs, etc.).
What Can Go Wrong Here?
Vertical scaling sounds simple, but it can introduce new problems if you’re not careful. Here are a few common pitfalls:
Out of Memory (OOM):
Adding too many workers or threads can quickly eat up your server’s memory—leading to crashes or service restarts.
Database Connection Contention:
Too many threads and not enough connections in your DB pool can cause errors like
PG::ConnectionTimeout.Multithreading + ActiveRecord = Risky Business:
Rails isn’t always great at handling race conditions, especially if your code relies on shared state. Be extra cautious when going multithreaded.
So, wrapping up vertical scaling: increasing RAM and the number of threads or workers can truly help, but only if:
- You’re hitting the limits of your current server.
- Your database can handle the number of connections.
- You’re dealing with IO-bound tasks or a high number of simultaneous requests.
If your app is slow due to things like inefficient SQL queries, N+1 issues, or poor architecture, then simply throwing more hardware at it won’t solve the problem.
In this case, as a Rails development company, we advise doing vertical scaling together with horizontal scaling. This way, you’re making your servers more powerful and your entire system more resilient and future-proof.
Thus, when we helped Yelz online store with growing, we started with vertical scaling by slightly increasing RAM and adding a few database threads and workers. To further boost concurrency, we introduced horizontal scaling by running multiple Puma instances behind a load balancer, ensuring better request distribution and reliability under traffic spikes.

Now, with the help of our RoR development team, we’re sharing some helpful tips and best practices of both types of scaling to keep your Rails app speedy, reliable, and ready to handle growth.
Best Practices for Scaling Rails App
Taking your Ruby on Rails app to the next level through scaling is part exciting journey, part tricky puzzle – rewarding, but not without its hurdles. As more people start using your app, you’ll naturally hit some bumps along the road. Things might slow down, your server might feel the strain, or certain parts of your app could start behaving unpredictably under load.
Thankfully, Rails provides plenty of practical tools and approachable strategies to help you scale smoothly.
1. Start with Profiling
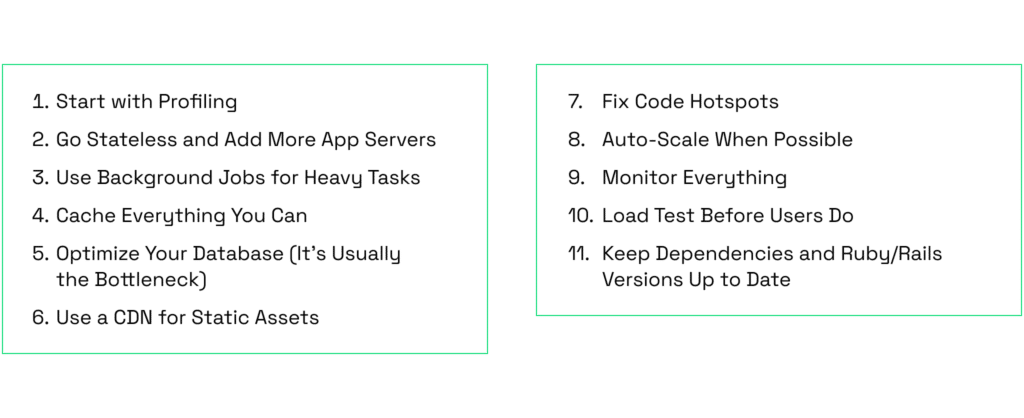
Before scaling, measure first. Use tools like Skylight, rack-mini-profiler, or New Relic to identify bottlenecks.
Start with the usual suspects: N+1 queries, slow database calls, or inefficient rendering.
You can’t fix what you can’t see, so profiling is always step one.
2. Go Stateless and Add More App Servers
Rails apps scale smoothly when they’re stateless, when each request can be handled by any server without relying on local memory or disk. Store things like sessions in Redis or the database, not on the file system.
Once you’re stateless, you can easily spin up more app servers behind a load balancer. It’s like opening more checkout lines at the supermarket. The shorter the lines, the faster the service.
3. Use Background Jobs for Heavy Tasks
Don’t make users wait for long processes like sending emails, generating PDFs, or resizing images. Offload those to background jobs using tools like Sidekiq or Resque.
It’s like asking someone else to handle the dishes while you keep cooking. It keeps your app responsive and fast.
4. Cache Everything You Can
Caching is your best friend when traffic spikes. Use Rails’ built-in caching or a cache store like Redis to store rendered views, partials, and the results of expensive queries.
For example, if your homepage runs 10 database queries and rarely changes, cache the full page for 5 minutes.
Rails also supports SQL caching, which automatically reuses the result set of identical queries within a single request cycle, reducing redundant DB hits during that request.
5. Optimize Your Database (It’s Often the Bottleneck)
No matter how much you scale your infrastructure, slow SQL will result in a slow application. To improve performance:
- Add appropriate indexes to speed up data retrieval.
- Avoid N+1 queries and use eager loading (e.g., .includes) to minimize the number of database calls.
- Leverage tools like EXPLAIN ANALYZE to inspect how queries are executed and pinpoint performance issues.
To catch inefficiencies early, such as N+1 queries or redundant eager loading, you can use gems like Bullet, which alert you during development.
If your system mainly retrieves data rather than modifies it, you can create copies (replicas) of your main database. These copies handle read requests while the main database handles writes. This spreads out the workload and makes data retrieval faster since multiple users can fetch data from different copies simultaneously.
6. Use a CDN for Static Assets
Avoid serving static files like images, JavaScript, or CSS directly from your application server. Instead, offload them to a Content Delivery Network (CDN) such as Cloudflare or Amazon CloudFront. CDNs distribute and cache static content across a global network of edge servers, allowing files to be delivered from locations geographically closer to your users.
When a user requests an asset, the CDN checks for a cached version. If one is available, it delivers the content instantly from the closest edge server, which reduces latency, improves load times, and lightens the demand on your origin server.
Modern CDNs also support cache control headers, giving you fine-grained control over how long assets should be cached and when they should be invalidated or refreshed. This ensures your users always receive the most up-to-date content without sacrificing performance.
7. Fix Code Hotspots
Use tools like New Relic, Skylight, or Rack Mini Profiler to find slow endpoints or memory-hungry features.
Most of these tools allow you to see how long each controller action takes to respond, which helps you pinpoint performance issues more precisely. Instead of guessing, you can focus directly on the parts of your app that are slowing things down.
Even a single poorly written query can severely impact performance under high traffic, so it’s important to catch and fix them early.
8. Auto-Scale When Possible
If you’re on AWS, Heroku, or a Kubernetes setup, enable auto-scaling so your infrastructure grows (or shrinks) with real-time demand. This keeps things smooth without overpaying for idle servers.
It’s like having an elastic dining table that expands when guests arrive and shrinks when they leave.
9. Monitor Everything
Make monitoring a priority. Use tools like Datadog, Prometheus, or even just your Rails logs combined with Logstash. These tools help you stay aware of your app’s performance, catch errors quickly, and track infrastructure usage in real-time.
It’s your early warning system. If something starts misbehaving, you want to know before users do.
10. Load Test Before Users Do
Before a big launch or event, try tools like JMeter, k6, or Loader.io to simulate real user traffic and find weak points. This way, you can identify and fix weak spots in your system ahead of time, instead of discovering them when your users do.
11. Keep Dependencies and Ruby/Rails Versions Up to Date
New versions of Ruby and Rails often come with performance improvements. Don’t wait years to upgrade. Staying current makes scaling easier.
Ruby on Rails gives you a strong foundation, but even powerful frameworks need some prep when traffic starts to climb.
Begin with performance fundamentals like implementing background processing, database indexing, and caching strategies. As your needs increase, expand your infrastructure horizontally and build automation systems.
To keep things running smoothly and scale your application effectively, it’s best to hire a skilled Ruby on Rails development team that understands how the Rails codebase behaves, knows what pitfalls to expect, and can address them in a timely manner.

Typical Mistakes When Scaling a RoR App
When scaling a Ruby on Rails app, you cannot just throw more hardware at the problem and expect everything to work smoothly.
In 12 years of working with Ruby on Rails projects, our RoR developers have seen many scaling efforts fail, often due to avoidable, common mistakes made by previous teams.
Let’s walk through some of the most frequent ones.

1. Relying Only on Vertical Scaling
Simply increasing server resources (CPU and RAM) without optimizing system architecture is a short-term solution. This approach eventually hits performance limits as user demand increases, leading to inevitable slowdowns.
2. No Monitoring in Place
Another major mistake is skipping performance monitoring tools to track your app’s server load and potential problems.
An important insight comes from our RoR developer, Vlad Shishko, who notes:
3. Ignoring Database Health
The database is often the first bottleneck in a growing Rails app, and many developers overlook it.
Skipping indexes, not setting up read replicas, misusing ActiveRecord (think N+1 queries or pulling huge chunks of data into memory), and not managing your connection pool properly are all common mistakes that can drag down performance fast.
4. No Load Testing
Don’t wait for real traffic to discover problems. It’s like stress-testing a bridge before opening it to traffic.
The scaling process can take a lot of effort and might uncover unexpected issues in your code. That’s why it’s so important to trust your app to RoR developers with proven experience who know how to scale it the right way.
RoR Infrastructure for Scaling: How to Avoid Difficulties from the Start?
Planning your app’s architecture early on is one of the smartest moves you can make. It allows you to develop something robust from the start without running into major issues or having to spend a bigger budget on fixes later. Thinking about scalability from day one also makes life way easier for your developers, as it speeds up the scaling process when the time comes.
This is what you can do before starting your product.
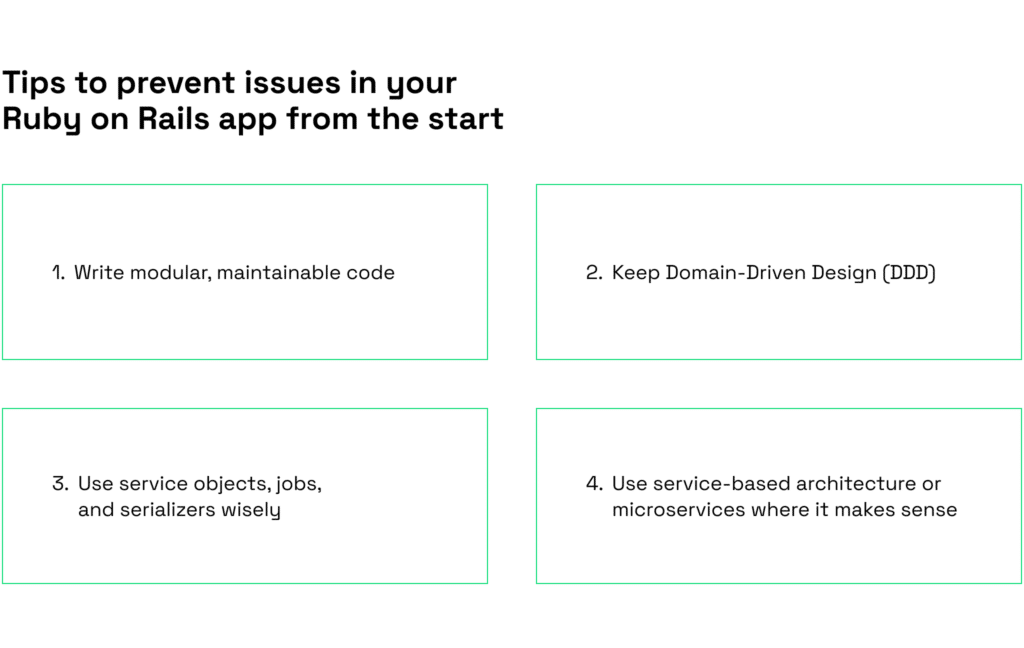
- Write modular, maintainable code
Think of your codebase like a well-organized toolbox. Everything should have its place and purpose. Avoid stuffing too much logic into models or controllers. Break things into smaller, reusable parts. This not only makes your app easier to understand but also easier to scale and debug later.
- Keep Domain-Driven Design (DDD)
DDD means building an app around real-world business logic. Instead of forcing all logic into Rails conventions, create meaningful structures that match your domain like organizing features into clear domains or using form objects, value objects, and policies. This makes your app more flexible as it grows.
- Use service objects, jobs, and serializers wisely
Service objects help move heavy logic out of controllers and models into dedicated classes. Keep them focused on one service, one job.
Move time-consuming tasks (like emails and API calls) to background jobs using tools like Sidekiq to keep your application responsive and user experience smooth.
Serializers (like AMS or fast_jsonapi) help you shape your API responses cleanly. Don’t send more data than needed—keep it lean and tidy.
- Use service-based architecture or microservices where it makes sense.
Rails is fantastic for building monoliths quickly, and that’s usually the right place to start. But as your app grows, some parts like background jobs, file processing, or notifications, can become bottlenecks. When that happens, consider extracting them into separate services or even lightweight microservices. This lets you scale and deploy those parts independently, without dragging down the whole app. You can find more about monoliths and microservices in our recent blog post with real-world examples.
These early architectural choices might appear like more effort up front. However, they’re investments that pay off significantly as your application grows. Start with a solid monolith following these principles, monitor your application’s performance, and let actual usage patterns guide your scaling decisions. The key is finding the right balance between over-engineering and maintaining flexibility for future growth.
Final Words
No matter the size of your business, building an application that can scale is the key to keeping solid performance = delivering high-quality services to your customers and users.
By planning for scalability early, you’re setting your system up to handle the unexpected: traffic spikes, increasing user flows, and the addition of new features. Instead of scrambling to fix performance issues later, you’ll be ready to grow with confidence.
You can scale a Ruby on Rails application in two primary ways:
- Vertically, by enhancing your existing server by adding more memory and CPU power.
- Horizontally, by spreading the workload across multiple servers to handle increased traffic and demand.
To do it right, it’s important to follow best practices that ensure a smooth and efficient scaling process. And when hiring a Ruby on Rails development team, whether you’re building from scratch or scaling an existing app, make sure you’re working with professionals who have proven experience in scaling.


