Why your design system should guide – not dictate – product development. We explore the sweet spot between maintaining UI consistency and allowing necessary pivots as your mockup transforms into a market-tested MVP.
In reality, success depends on how well the product functions in the real world. Users are not always concerned with small details such as margins or line thickness. They care about whether your product helps them accomplish their goals. And to test that, there’s no other way than to give them that opportunity.
But how do we go from design assets to a product that real people can actually use? The answer lies in the MVP (Minimum Viable Product). In this article, we’ll break down the role of wireframes, mockups, and prototypes in the product lifecycle, explain how to prioritize features for an MVP, and show how a well-coordinated process between design and development teams can help you deliver faster, smarter, and with fewer surprises along the way.
If your startup is stuck between “looks great in Figma” and “actually works for users”, this article is for you.
Contents
- Not Just Pretty Pictures: What Wireframes, Mockups, and Prototypes Actually Do
- MVP: Moving from Screens to a Usable Product
- Design-to-Dev: A Real MVP Case
- How to Stay True to the Mockup During Development
- Checklist: Can Your MVP Be Built on Time?
- Conclusion
Not Just Pretty Pictures: What Wireframes, Mockups, and Prototypes Actually Do
First, let’s draw a clear line between wireframes, mockups, and prototypes. These terms often get mixed up on the Internet, and we’ve also seen cases where clients mean completely different things when using the same word.
All these are used to illustrate the intended product, collect feedback, present it to the customer, and achieve a common vision. While they might look similar to someone outside the design team, each one plays a unique role in the product development process.
Wireframes are the rough version of a future design. You won’t see any details here, just a basic layout of elements. They’re usually created during brainstorming sessions once audience research and surveys have been completed. You don’t need any special software to create them – a pen and paper or whiteboard will suffice.
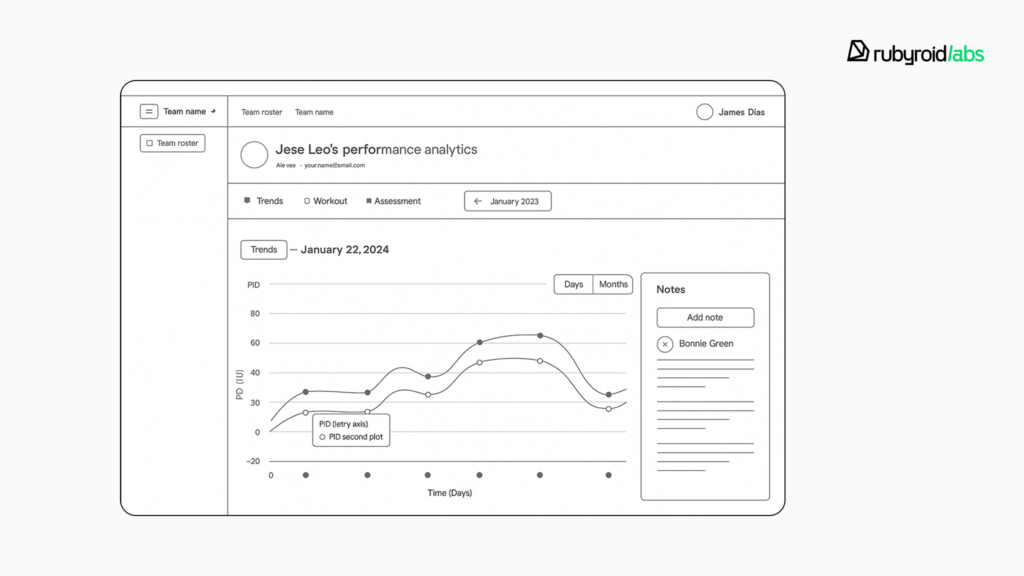
Wireframes help teams agree on core functionality, and the lack of visual elements such as colors or logos is deliberate, as it keeps focus on whether the structure and features support user goals. Some designers break wireframes down into stages: low and high fidelity. In fact, a high-fidelity wireframe is often what we’d call a mockup.
Mockups are detailed, static visuals of what a website or app will look like. They include visual details like colors, fonts, icons, navigation, images, illustrations, and text. Designers often create more than one mockup for the same functionality so decision-makers can compare options and pick what works best. Creating mockups takes more skill and requires dedicated interface design tools.
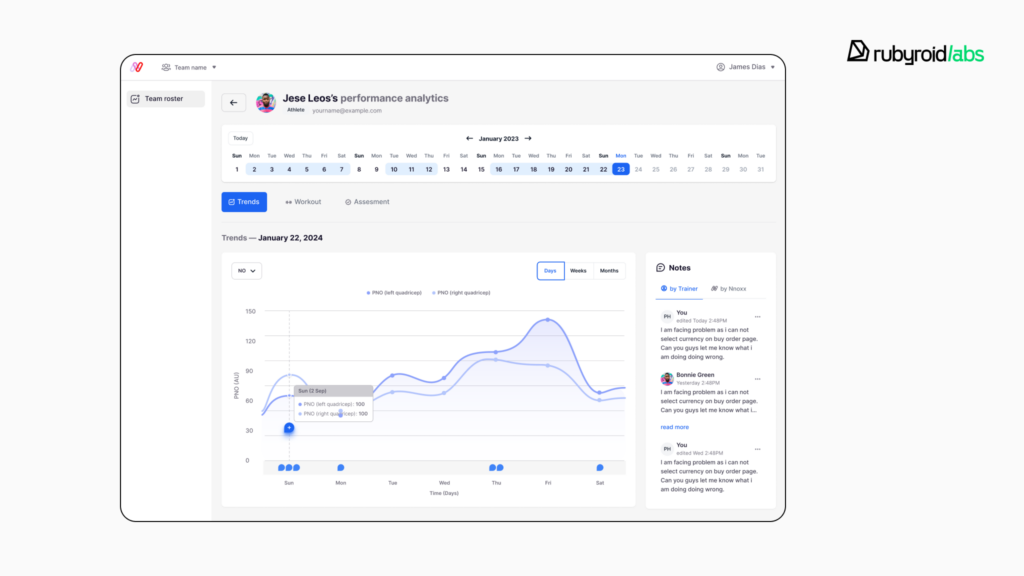
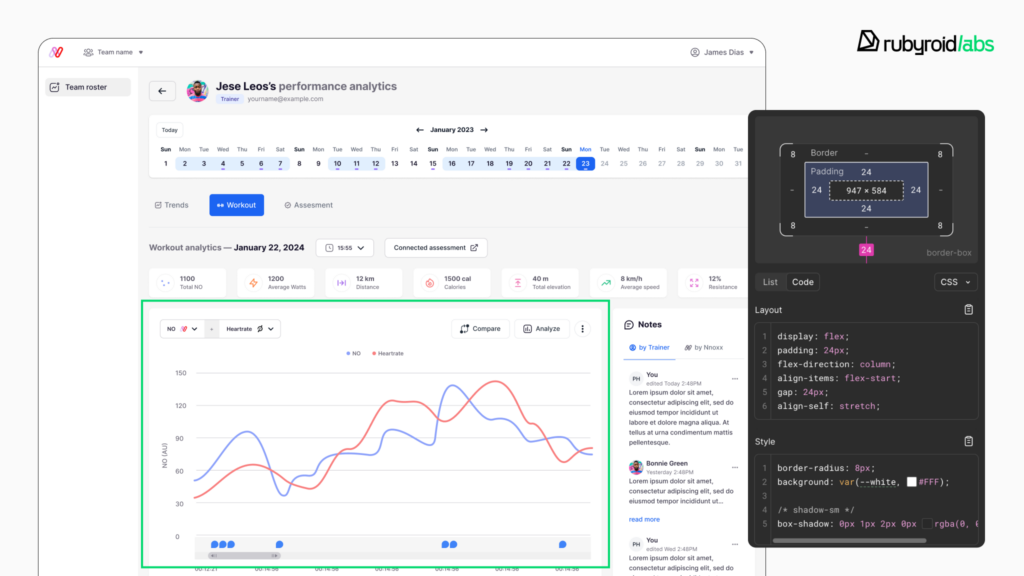
One more thing: developers rely on mockups when writing code. In Figma (the most widely used interface design tool today) there’s a developer mode. It lets devs click on an element and grab ready-to-use code snippets that describe it.
Prototypes are a lot like mockups, but with added interactivity, built using UX tools, not actual code. In Figma, this is done through the Prototyping feature and various plugins.
When viewed in presentation mode, a prototype feels like a clickable version of the mockups. You can tap, click, or swipe to move between screens or see what happens when a button is pressed. They’re not fully functional, but they’re interactive enough to test key ideas.
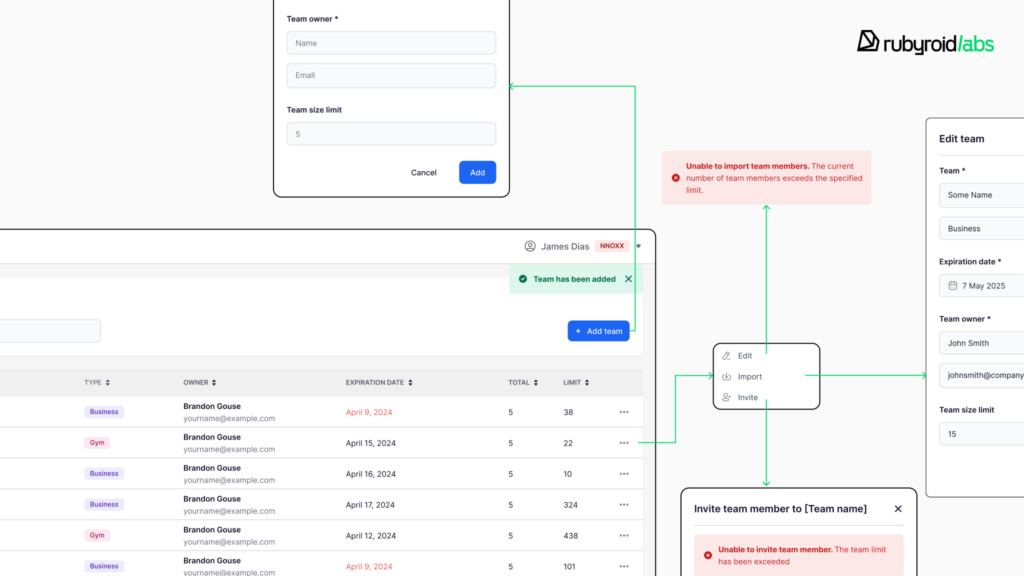
Prototypes are used for user testing and presenting the design to stakeholders. They help to see how people navigate the product and whether the design choices make sense. Just like mockups, prototypes are handed off to developers. Having that interactive version makes it easier for devs to understand the design vision.
Everything we’ve talked about so far belongs to the design phase. In the next chapter, we’ll shift to the development and take a closer look at how MVPs help turn these early design decisions into something real.
MVP: Moving from Screens to a Usable Product
Building MVP from prototype means making a series of informed bets. You’re betting on what users will value, how the design should guide their behavior, which architecture will hold up over time, how to position the product in the market, and what kind of monetization model will work.
But the truth is, no matter how experienced you are, some of those assumptions will turn out to be wrong. And the tricky part is – you don’t know which ones. The only way to find out is to get your product in front of real users as soon as possible.
That’s why most companies and startups don’t launch a full-scale product right away. When they hire a team to build software, they usually ask for an MVP.
An MVP is a stripped-down version of a product built to see how people actually use it. It includes just a few standout, high-impact features, the ones that really set the product apart.
An MVP shouldn’t feel broken or half-baked. There should be no constant bugs or endless 500 errors. However, it’s not meant to be packed with everything. The main goal is to test whether users see enough value to actually use or pay for it. This means that your key features must be there, but not everything else.
How to Build a Truly Viable Product
Early-stage companies often run into trouble when it’s time to prioritize core functionality. It’s not always easy to separate what’s essential from what can wait. The risk? You might end up building features no one actually needs.
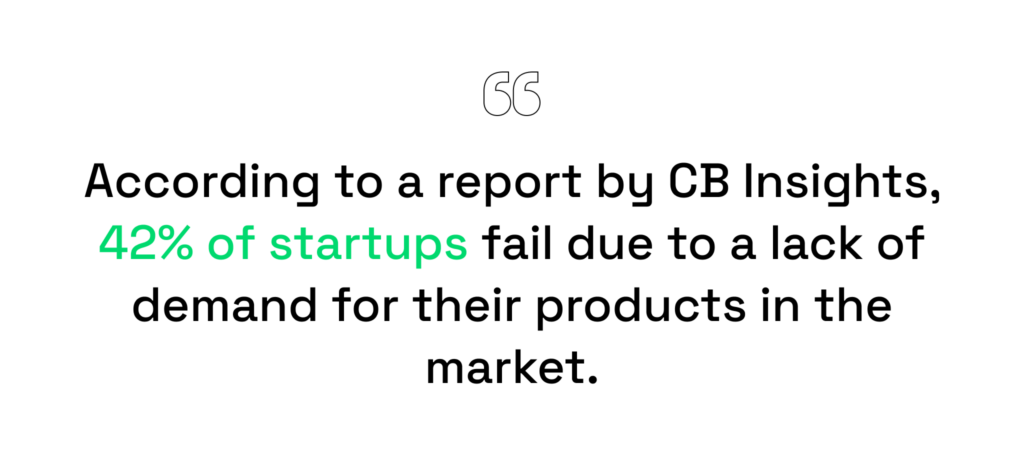
According to a report by CB Insights, 42% of startups fail due to a lack of demand for their products in the market. That’s why you can’t just dive into development and figure it out as you go. Companies that skip early planning often pay more later in the development stage than those that invest in proper research upfront.
To avoid those costly mistakes, a development team should guide the client through the pre-project discovery process and help define what really matters before a single line of code is written. You can consult us to reduce IT expenses, avoid costly development mistakes and build a stellar product.
Pre-Project Research: Who’s Involved and What They Do
Pre-project research is usually handled by a team that includes product manager and UX designers. They dive into the client’s business and industry, discuss goals and expectations, explore the target audience, and analyze competitors, spotting trends, identifying strong and weak practices, and pulling examples from the market. This kind of deep research helps shape the overall product vision, outline key user scenarios, and build a meaningful backlog.
Feature Prioritization Techniques
A common issue: wanting everything all at once and as soon as possible. Unfortunately, it rarely works that way in practice – you usually have to choose between speed and quality (though at Rubyroid Labs, we always aim for a healthy balance).
An MVP can’t be built on killer features alone. As mentioned earlier, it still has to be a complete product, even if it’s not a full one. That means going through the entire core backlog and deciding what makes the cut. The challenge is to select the smallest possible feature set that will still meet the most important user needs.
We recommend taking a look at the MoSCoW and Kano methods to help you sort things out.
MoSCoW is an acronym that stands for four categories used to prioritize features: Must Have, Should Have, Could Have, and Won’t Have.
- “Must have” are the essential features. Without them, the product has no reason to launch. This category also includes anything required by law or security standards. For example, a healthcare app in the U.S. must comply with HIPAA (Health Insurance Portability and Accountability Act) regulations.
- “Should have” are important and would hurt to cut, but they’re not absolutely critical. Often, they’re things your competitors already offer. Leaving them out could put you at a disadvantage.
- “Could have” are nice-to-haves. They can be excluded from the first release without too much impact, especially if time or budget is tight.
- “Won’t have”, as the name suggests, won’t make it into the MVP. They’ll go into the post-MVP backlog and can be revisited later.
To determine which features matter most, the Kano model sorts them into three groups based on user impact.
- Expected features. These represent the basic functionality that users take for granted. Their absence often results in dissatisfaction, while their presence typically goes unnoticed. Such features are considered standard in most products within the same category. An example would be the ability to edit or delete a sent message in a messenger.
- Satisfiers. These features contribute to overall user satisfaction. While not strictly necessary, their presence significantly enhances the user experience. A common example is the display of lyrics in a music app.
- Delighters. These are unexpected features that can positively surprise users. They are usually more resource-intensive to implement and are not required for the core experience. However, when included, they often leave a strong positive impression. Their absence does not typically lead to negative feedback.
When planning development, features from the expected group are addressed first, as releasing a product without them is likely to cause frustration and negative feedback. Once the essentials are covered, satisfiers are added to improve usability and make the product more enjoyable to interact with.
Delighters, if any are included, are developed last. These features are not critical to the product’s success but can create a more memorable experience if time and resources allow. In an MVP, even a single well-placed delighter can be enough.
That’s only the first layer of sorting. The next step is to see what’s realistic. Some standout features might look great on paper, but the cost or complexity of building them can be a dealbreaker. To make a smart call, it helps to check in with the tech team. Their feedback can highlight what’s practical right now, and what’s better saved for later. After that, the backlog gets a second round of filtering.
Planning and prioritizing features is only part of the work. Even a carefully defined MVP still has to be built. Moving from research and design to a working product involves cross-team coordination, smart decisions about scope, and careful timing.
The next chapter breaks this process down using a real example: how a client MVP went from polished design mockups to a functional release, and what it took at each step to get there.
Design-to-Dev: A Real MVP Case
Known for its cutting-edge biosensor, NNOXX had already earned a reputation among top U.S. sports leagues like the NBA and NHL, as well as with Olympic teams. The device was capable of measuring how effectively muscles were working in real time. But having access to raw data wasn’t enough. The real challenge was turning those numbers into actionable insights.
NNOXX found that professional athletes were experiencing overtraining and continuous overload, which led to injuries, long recovery periods, and missed competitions.
That insight became the spark for a new goal to create a digital product that would not only collect data from the NNOXX device but also make sense of it. The client envisioned a smart, AI-powered health and fitness platform that could offer personalized recommendations based on real-time performance. And that’s when they reached out to Rubyroid Labs.
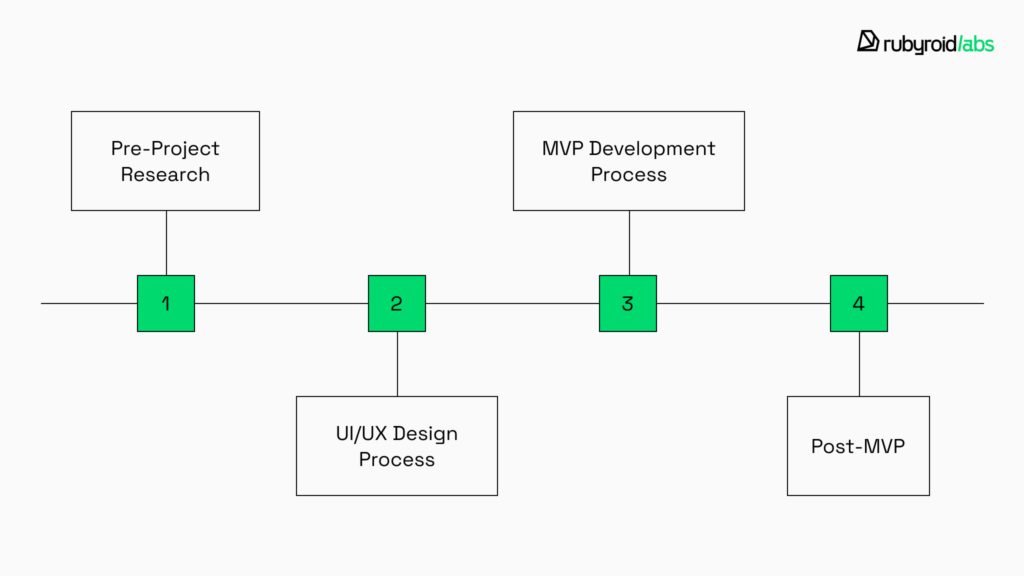
Stage 1: Pre-Project Research
Working closely with our business analyst, the NNOXX team outlined their core goals and business needs. Together, we explored what kind of app it would be and what features needed to be included from day one.
During early interviews with the client, we gathered details about who would be using the app, where they were located, and what devices they preferred.
Since we were planning to develop an MVP for a startup, the requirements changed frequently. All in all we identified five key user types: athlete, elite user, trainer, account manager, and system user. For each of them, we mapped out specific roles, use cases, and features that would eventually shape the MVP.
By the end of the discovery phase, we had a clear vision of the platform, a product development roadmap in hand, and early wireframes that would soon become the foundation for development.
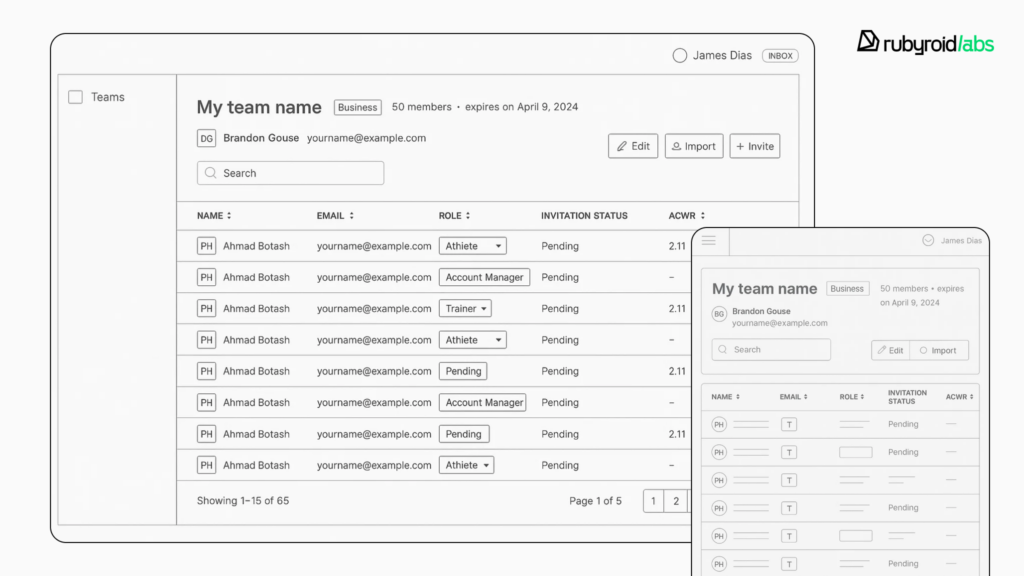
Stage 2: UI/UX Design Process
Once we had a clear picture of the product vision and user roles, it was time to move into design. Our UI/UX designer teamed up closely with the business analyst and the client to shape how the app would look and feel. The client made it clear that this shouldn’t be another generic fitness app, it had to be distinct from the crowded field of workout and nutrition tools.
To help guide the visual direction, the client shared their brand book, which included the color palette and logo. That gave us a strong starting point, but we still had a lot of freedom to explore how to reflect the product’s innovative core through the UX and UI. Over the next three months, our designer crafted a full set of user stories and turned them into detailed design mockups and prototypes for every screen in the MVP.
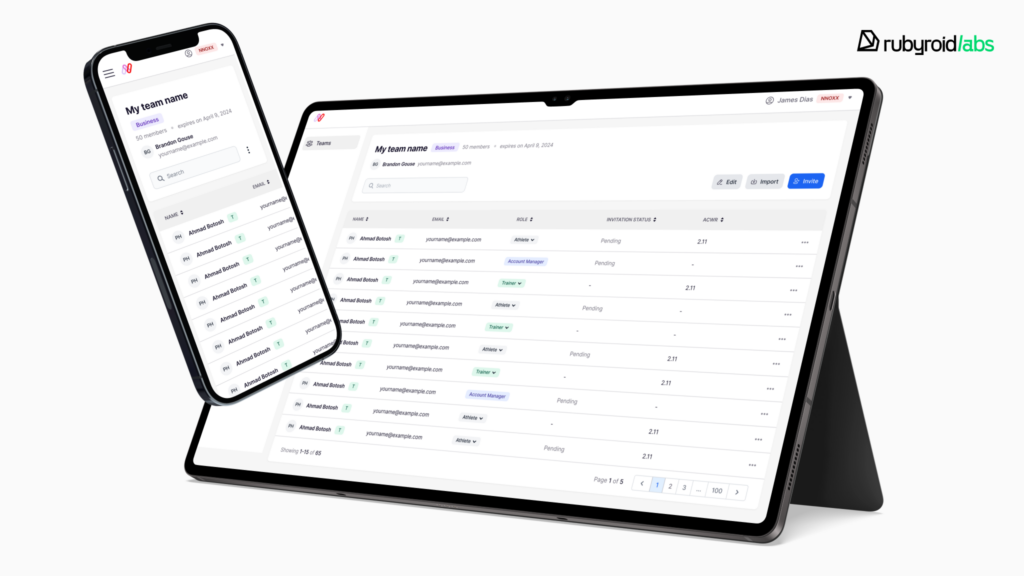
Stage 3: MVP Development Process
Once the client had a full view of what the product would look like, our team sat down with the client and business analyst to finalize a few key decisions. Together, we defined the scope of the MVP, set feature priorities (using the Kano model), and agreed on the tech stack that would power the platform. We also mapped out a clear development roadmap, giving everyone an understanding of what was coming next and how long each stage would take.
Once all of that was approved, we kicked off development. Our engineers focused on building a scalable architecture that could support multiple user roles and deliver high performance from day one. While the dev team handled the core functionality, our QA engineer was already involved, testing features as they were implemented.
Over the next three months, we delivered a working MVP with a full range of functionality tailored to each user type. Athletes could log in, manage their profiles, and connect with their teams. Trainers were able to create and manage team rosters, track performance data, and analyze workouts. Elite users and account managers each had their own dashboards and controls to access analytics and manage teams. The client had a functional product ready for testing with real athletes, and a clear picture of how the app could grow next.
Stage 4: Post-MVP
After launching the MVP, the focus shifted to refining the product based on feedback. Athletes and coaches had started using the platform, and that gave the client valuable insights into what worked well and what could be improved. We used this input to adjust priorities. Alongside enhancements, we also tackled bug fixes and general optimizations to make the app faster and more stable.
Our developers kept adding new functionality, expanding user roles, and improving data flows. One of the major updates during this phase was the rollout of tools for system users. They got access to CSV workout data downloads, full team management controls, performance analytics, advanced workout comparisons, and note management features. Throughout this phase, we ran regular testing cycles.
In total, it took 18 months to complete the full version of the platform, and we delivered it on time and within budget. But the project didn’t stop there. We’re still working with the client, developing features for new user roles, integrating third-party services, and providing ongoing support.
How to Stay True to the Mockup During Development
First, the designer whips up a mockup that lays out exactly how everything should look and function. Then the developer takes that mockup and turns it into the actual working product.
That’s why ongoing communication between designers and developers is so important. At Rubyroid Labs, we treat design not as a handoff to developers, but as a partnership. Designers stay involved long after their work in Figma is “done”. Once a feature is developed, we run design QA – a dedicated review process where designers go through the implementation, compare it to the original design, and flag any visual or UX inconsistencies. In most cases, there’s something to adjust. Without this step, small issues can easily slip through and snowball into bigger problems later, especially once users get involved.
Skipping design QA might save you a few hours in the short term, but it often costs more in the long run. If you’re curious about how to structure this process effectively, we wrote a full article on the topic: Integrating QA into the Design Workflow: Best Practices and Methodologies.
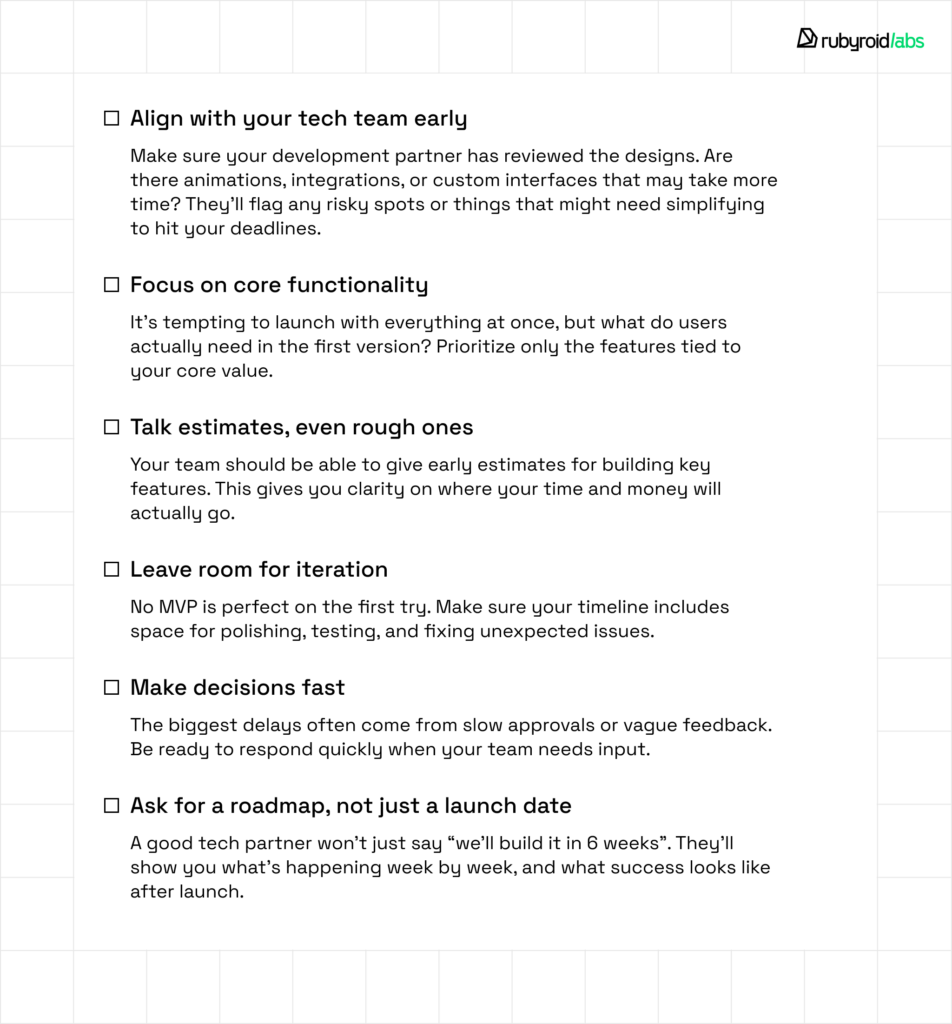
Checklist: Can Your MVP Be Built on Time?
Got an idea and a beautiful design in Figma? Great. But before you move into development, it’s worth taking a quick pause to check: is your MVP actually deliverable within your deadline and budget?
Use this checklist to stay confident, and avoid costly surprises down the line.
Conclusion
Wireframes, mockups, and prototypes are not “just pretty pictures”, but working tools that help both the client and the technical team align on functionality, structure, and visual solutions before development begins. MVP is not a stripped-down version of the final product, but a way to quickly test key hypotheses on real users without wasting resources on something that may not be needed.
To make it work, you need solid research, clear priorities, and close collaboration between designers, analysts, and developers. The shift from design to development always brings adjustments: some features change, others get cut, and that’s okay. What matters is staying aligned and making sure every step moves the product forward.
Start with an honest review of your current workflow:
- Are your designs validated by research?
- Are priorities clearly defined?
- Do teams understand each other’s goals and constraints?
If not – that’s the first thing to fix. At Rubyroid Labs, we treat product design and development as an ongoing process, rather than a series of hand-offs. With careful planning even a first version of a product can provide real value.
Ready to turn your designs into a working product? Fill out the form or drop us a line. Let’s build your MVP together.


